Last Update:- 5th May 2024
TIP:- The filter effects are best viewed on a 27" 5K iMac and second best on a Macbook Pro.
I've been having fun editing my older DSLR raw and jpeg files. All the images in this article were edited in Photoshop or PhotoLab. I used DxO FilmPack to add an analog film look to each image. Many of the photos were taken with E-Series DSLRs.
It's now possible to extract more data with the newer iterations of Photoshop, DxO, and Workspace. They literally make older raw files shine again...
It is surprising to see how effective these raw converters are today. Looking at the results, PhotoLab is a step above the rest when converting Olympus raw files. The dedicated DxO lens database is the key to this performance.
Now is the time if you have a collection of raw files waiting for the right Raw Converter. I kept reworking my older raw files and only got satisfactory results when I purchased PhotoLab. DxO also improved its editing sliders in newer versions of PhotoLab.
Olympus E520 with 14-42mm Kit Lens - ISO100, f13, 1/160 (FilmPack 5 - Agfa Ultra Color 100).
E520 with 14-42 Kits lens - ISO400, f3.5, 1/15 (Left=Cross Processed Kodak Elite 100, Right=Fuji Superia Xtra 800).
My first Olympus DSLR was an E-410 with 14-42mm and 40-150mm kit lenses. My previous DSLR was a Canon 350D and a PowerShot G7 compact camera. I had good results with Canon. When I bought the Olympus E-410, I was surprised to see how well this tiny camera performs.
The image below was taken with my tripod and 3 bracketed images. I created the HDR in Photoshop and the film profile with FilmPack 5. I added specific details below each image. Click on any image to see them in the Blogger Image Viewer.
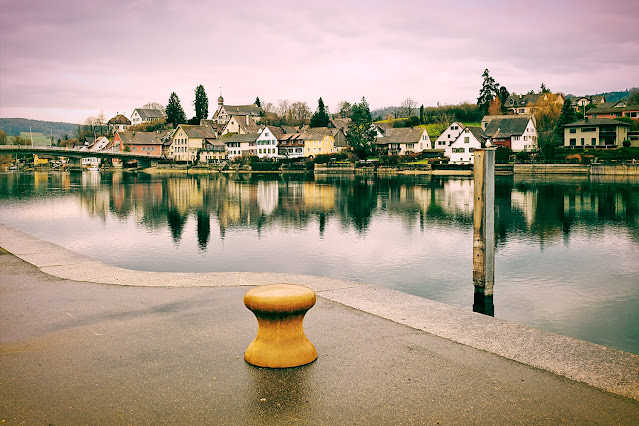
Olympus Pen F w 17mm f1.8 lens - ISO200, f5.6, 1/400 (Raw edited in PhotoLab 4 plus Fuji Provia 100F profile).
Olympus E410 with 14-42mm Kit Lens - ISO200, f10, 1/40 (HDR in PS with FimPack 5 - Fuji Provia 100F).
Olympus E3 with 14-54mm f2.8-3.5 - ISO160, f8, 1/160 (Kodak E-100 GX Extachrome 100).
Olympus E420 with 40-150mm, f4-5.6 - ISO100, f14, 1/80 (Generic Fuji Provia 100).
Almost all photographers will agree that the Pen-F is one of the most exciting creations from Olympus. It wouldn't surprise me if they become collectors' items. Following them on the secondhand market, I noticed they are nearly more expensive than the original selling prices.
I have been using my Pen F with my older E-Series DSLRs. As said, I am working on a profile to mimic the E-Series jpeg output. That said, it seems easier said than done. Almost every E-Series camera has a unique analog image look. One should create an E-1, E-500, E-410, E-620, or E-330 look.
Olympus E410 with 14-42mm w Kit lens - (PhotoLab 3 with Adox Color Explosion).
Olympus E500 Jpeg directly out the camera - not edited and no filter - Image was taken in South Africa.
Olympus E450 w 18-180mm f3.5-6.3 - ISO100, f7.1, 1/250 (Jpeg edited w PS Raw + Lomography Redscale 100).
Olympus E30 w 14-54mm f2.8-3.5 - ISO100, f7.1, 1/400 (Edited w PS and Generic Kodal Ektachrome).
I often wondered about the original R&D specifications while working with some of my older E-Series DSLRs? What were the main challenges Olympus engineers faced when designing Olympus cameras like the E-1 and E-410 or unique cameras like the Olympus Pen-F or E-330?
Were they tasked to create DSLR cameras that should shift film or analog photographers toward digital cameras? When last did you use an older E-Series camera? Did Olympus continue this strategy with their mirrorless cameras, or are they now focussing on digital competitors?
Olympus E3 w 14-54mm f2.8-3.5, ISO100, f7.1, 1/160 (PhotoLab 3 w Fuji Velvia 100).
Olympus E620 w 18-180mm f3.5-6.3 - ISO100, f11, 1/100 (Raw edited in PhotoLab + Fuji Velvia 50).
Olympus E30 w 40-150mm f3.5-4.5 - ISO100, f4.4, 1/80 (Edited w PS and Fuji Sensia 100).
My focus was the IQ differences when I compared the EM5 MKII and the Pen F. Apart from having different image sensors, they are functionally almost identical. Did Olympus supercharge the EM5 II by upgrading an already capable 16MP sensor to the new 20MP sensor? The next step was to add more powerful and Creative Color Features to Workspace and the Olympus Pen F.
It would have been nice to have more information on the older E-400? This is another one of those unique E-Series cameras with a 10MP CCD sensor. It's the only Four-Thirds camera with a 10MP CCD sensor. I am fortunate to still have one of these unique DSLR Olympus cameras.
Olympus E510 w 14-54mm f2.8-3.5 - ISO100, f10, 1/160 (All edited with PhotoLab 3 + PS + Ilford Pan 100).
Olympus E620 w 12-60mm f2.8-4 lens - ISO640, f3.9, 1/100 (Raw edited in PhotoLab 4 + KodakChrome 64).
Olympus E410 with 14-42mm w Kit lens - ISO100, f4.5, 1/40 (PhotoLab 3 with Kodak Porta 160).
Olympus E410 w 14-42mm kit lens - ISO100, f8, 1/160 (Edited with PhotoLab 3 w Agfa Vista 200).
DxO FilmPack 5 is one of the most edit-friendly filter software packages. It's possible to quickly create an analog film look with the different FilmPack film profiles. For example, record high-quality jpegs for FilmPack 5 with the exposure techniques in my articles. For more info, see this video.
It's possible to apply film profiles on jpeg and raw files in DxO FilmPack 5. Photographers preferring jpeg files can open the image in FilmPack, readjust any ETTR adjustments, and add color corrections. Next, you will apply your analog filter. FilmPack also allows us to fine-tune its filters and save it as a new analog profile. That means you can create your own specific image look in FilmPack 5.
Olympus E450 w 18-180mm f3.5-6.3 lens - ISO100, f9, 1/320 (Edited with PS + Kodak Kodachrome 64).
Olympus E410 w 14-42mm Kit lens - ISO100, f9, 1/250 (PhotoLab 3 and Kodak Elite ExtraColor 100).
Olympus E450 w 18-180mm f3.5-6.3 lens - ISO200, f5.6, 1/160 (Edited w FilmPack Kodak Kodachrome 64).
DxO FilmPack is perfect for the photographer who uses jpegs and does basic editing. The DxO film profile adjustments are flexible enough to let them create a personal image look.
It has a basic exposure panel with some adjustments plus curves. It also offers basic creative sliders plus the ability to simulate some lens filters.
Olympus E620 with 12-60mm f2.8-4 lens - IS=160, f4.5, 1/250 (Raw edited with PhotoLab 4 + Fuji Velvia 50).
Olympus E620 w 12-60mm f2.8-4 - ISO3200, f2.8, 1/8 (Raw edited in PhotoLab 4 w DeepDive Noise removal, no filter applied).
Olympus E3 with 14-54mm f2.8-3.5 - ISO100, f8, 1/100 (JPEG Cropped in PS - no filters used).
Olympus E400 w 14-42mm kit lens - ISO100, f8, 1/6 (Edited in PS + Luminar 4 + Kodak B&W filter)
The panorama below consists of 4 jpegs from the Olympus E-520. I combined the images in Photoshop. Adobe did a great job of improving its panorama function. The "new" content-aware function also makes it easier to create panoramas. It's great to take a panorama sequence from 2009, build a panorama in Photoshop, and do the final finishing touches in DxO FilmPack 5.
Olympus E620 w 14-54mm f2.8-3.5 lens - ISO100, f7.1, 1/500 (Edited in PS + Luminar4 + Kodak Ektar 100).
Olympus E400 w 25mm f2.8 lens - ISO100, f7.1, 1/100 (Jpeg edit in PS raw, Luminar 4 + Fuji Provia 100).
Olympus E520 w 14-54mm f2.8-35 lens - ISO200, f13, 1/180 (Edit in PS, Luminar, Agfa Rollei 100 B/W 400).
Olympus E520 w 14-54mm f2.8-3.5 - ISO200, f13, 1/250 (Edited in PS + Kodak KodaChrome 64).
The HDR below consists of 3 bracketed images from 2011. It was a winter scene with random snow. The clouds with the disappearing sun were unique, whereas the rest of the scene were dull and boring. I used three +/- 1EV bracketed images and merged them in Aurora. I then edited the result in Luminar to create a 3D effect. I did some additional editing in Photoshop to lift the mid-tones while keeping the clouds as is. I added a film profile with the FilmPack 5 plug-in with the final step.
Olympus E400 w 14-42mm Kit Lens - ISO100, f8, 1/5 (3 image HDR in Aurora w Fuji Provia 100F).


