NEWS: See my latest article and Workspace FW page for a summary of OM-System's inability to update my Olympus E-M10 II...
Showing posts with label 2. Photography. Show all posts

Jan 3, 2020

Olympus Color and Creative Photography - Part 6

Last Updated: 28the July 2023

Introduction.


The Pen-F continues to be an excellent camera in 2023. This is the third iteration of this article. I added a brief overview of the Olympus Color and Creative Photography program and an example of a Fuji film profile for Olympus cameras. The OMD EM5 II was the first Olympus hybrid camera with the full Color and Creative Photography package from Olympus. The Olympus Pen-F and E-M1 II introduced the new Enhanced Raw Format and Olympus Workspace.

The original design of digital cameras is based on the core elements of analog photography. The focus was photography, sensor types, manual or autofocus, and exchangeable lenses. These core elements have improved over the past 20 years, and modern digital cameras generally produce good image quality. The only negative is the price/performance ratio became worse each year.

Olympus recognized this in the 1990s and added more core elements to its strategy. They introduced the first version of the Color and Creative Photography concept with the E-30, and the original OMD EM5 was the first Olympus camera with the LIVE COMP feature. This was also the first Computational Feature from Olympus. Interestingly, competitors and reviewers ignored this development until more recently. The OMD EM-5 II and the Pen-F introduced the next generation of this strategy.


It all started with this camera in 2015. They continue to deliver exceptional value and can be found for less than $400.

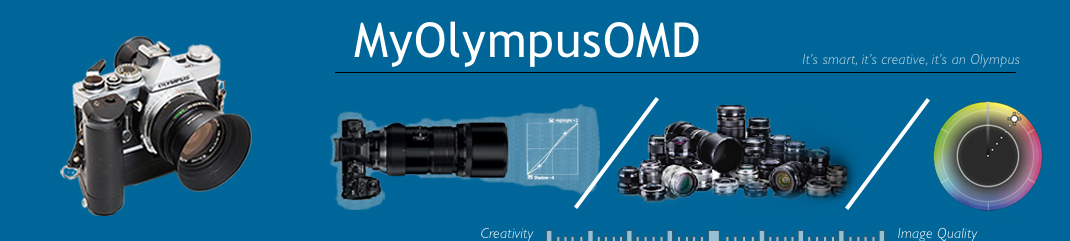
We will discuss the following in this article:-

  1. Introduction
  2. A brief overview of Olympus M43 cameras
  3. The differences between Fuji and Olympus
  4. Olympus Color and Monochrome Profiles
  5. Conclusion

2. A brief overview of Olympus cameras


Imagine that Canon launched the EOS 760D, Nikon the D7200, Sony the A7 II, Fuji the XT10, and Panasonic the G7 when Olympus launched the OMD EM5 MKII. Forum "experts" and reviewers raved about the Canon and Nikon DSLRs in 2015 because they had more megapixels, dual autofocus, and Live View. At the same time, Olympus unveiled its new Color and Creative Photography concept with the EM5 II. It took most competitors 8+ years to fully compete with the EM5 II...

I update my articles as I learn more about the Olympus Color and Creative Photography strategy. This includes technical updates, general information, and more about the Olympus Live MOS sensor. Did you know Olympus identified and perfected new technologies up to a decade before its competitors introduced anything similar? The Olympus version of IBIS is an excellent example of this...


Olympus EM5 II with 60mm f2.8 macro lens - High-Resolution Mode, Color Creator, edited in Workspace.


A short summary of the Color and Creative Photography concept from Olympus:-
  1. The 1st camera that introduced the unique Color Creator was the OMD EM1.  
  2. The Olympus Pen-F introduced Color Profiles and MonoChrome Profiles
  3. The ability to tweak the camera's Gamma Curve started with:
    1. Highlights/Shadows (EM1) and the Midtones EM5 II)
    2. The "Auto" Gradation option in the Olympus E520 DSLR
    3. The Tone Curve function in Viewer and later Workspace
  4. Great features like Live Composite and Live Time are unique to Olympus
  5. The Olympus iEnhance Picture Mode plus Color Filters (basic color filters)
  6. The Olympus SCN modes and ART filters improved with new cameras - EP7
  7. Olympus replaced Viewer 3 with WorkSpace with more advanced integration
  8. Workspace introduced the Enhanced Raw Format that is unique for Olympus
  9. For example, WS has the same Image Processing environment as its cameras
  10. I discovered Workspace simulates "Live View" after hours of editing with WS
  11. Then we have the "old-school" saturation, contrast, and sharpness (all brands)
  12. Features - Pro-Capture, High-Resolution mode, Live ND, and Focus Stacking
  13. Olympus designed and added a new core element with powerful creative features

Why call it Color and Creative Photography? It's an expression of how M43 photographers see the world. Forum experts and reviewers pixel-peep or say the High-Resolution function is limited to static scenes. M43 photographers embrace new technologies like the High-Resolution function. They view food, products, sunrise or sunset, and landscape photography like high-resolution options. They will use the High-Resolution function as an ND filter for moving water and street photography. They know High-Resolution applications improve the camera's dynamic range and visible noise. Creative M43 photographers understand high-megapixel applications and celebrate new features...


Olympus EM5 II with 12-200mm Lens ISO200, f6.3, 1/650 - Enhanced Raw converted in WS - Color Creator.

Only some photographers realized what happened when Olympus introduced the new Pen-F. We can compare the Olympus Color and Creative Photography concept with IBIS. It took Olympus 13 years to create a perfect IBIS solution and introduce 7.5 stops of in-body image stabilization for the Olympus EM1 III. Promoters spend hours distracting M43 photographers by claiming Olympus didn't invent IBIS. Canon likes you to believe they did more in 1 year than Olympus did in 12 years.

While being an exciting creative camera, the Pen-F always felt like an experiment. Was this a strategic decision from Olympus to test their advanced Art Processing capabilities in the Pen F? At the same time, camera reviewers and forum promoters complained about the placement of the Creative Dial as they wisely labeled it a marketing gimmick? They also pushed for full-frame DSLRs, more megapixels, 4K video, Live View for DSLRs, Mic inputs, and headphone outputs? 

The Pen-F Press Release notice continues to be a good read in 2023.

Press release summary: The Monochrome and Color features of the Pen-F started a new era for creative photography. It allows us to apply a new color and monochrome concept, plus the ability to follow any changes in the camera with Workspace and Live View. The Pen-F and the EP-7 are the best choices for photographers wanting advanced Color and Creative Photography features.


Olympus Pen-F with 17mm f1.8 lens - ISO500, f4.5, 1/60 - Enhanced raw file edited in Workspace - Color Creator.


3. Color Profiles and the differences between Fuji and Olympus


This is a great subject and could fill many pages of a separate article. I have been using Fuji for more than 2 years. The reason I bought the X-T4/5 is the ongoing uncertainty about OMS. OM-System did a great job launching the Olympus OM-1 and deserves positive feedback. I prefer Olympus used cameras like the EM5 II/III, Pen F and EP-7, OMD EM1 I/II/III, and the Olympus OM-1.

I prefer to support manufacturers with a history in the photography segment. Fujifilm is one of those companies. I bought my Fuji X-T5 shortly after it was introduced. The Fuji X-T5, Olympus EM1 III, and Pen F are great examples. The long-term viability and future of OM-System continue to be an open question. See my thoughts on the new O-M5, the OM1 II, and the lack of a Pen F II.

3.1 What's the difference between Olympus Color Profiles and Fuji


The difference is X-Trans sensors and the Color Filter Array. Don't let reviewers or forum promoters tell you it's Fuji marketing like they did with Olympus. Fuji is a market leader in traditional analog photography and how to integrate that experience in its modern X-Trans image sensors. Do your own research by starting with the above Fuji information.


Fuji cameras come with a selection of up to 18 film simulations like Provia (standard), Velvia (Vivid), Astia (soft), and several B&W and monochrome options. Each has a unique description to guide the photographer when selecting a film simulation. I never saw similar film simulations for Olympus or any other camera brand. One can add a Color Chrome Effect to these film simulations and the blue skies. The color chrome effect reminds me of the Color Creator from Olympus.

Study this link about the Fuji X-T5 and go down to the film simulations. The biggest strengths of Fuji and Olympus cameras are color, image quality, and the option of having the final image in the camera. The Fuji film simulations and JPEG files are superior to any other brand, and the Olympus Color and Creative Photography concept is better than anything else in this segment...

Fujix Weekly developed a unique community of Fuji owners. They created film filters like the one below. These filters are based on standard Fuji film Simulations with simple variations of basic camera settings. See the example below.


A new color Color Filter for the X-T5.


How to copy Fuji's film simulations for Olympus:-
  • Fuji Film Simulations - The Pen-F and E-P7 are the only cameras that can do this
  • Fuji Film Simulations - Workspace compliments the Pen-F and the E-P7 functions
  • Clarity and Color Chrome - Use Clarity in WS and the Color Creator = Chrome Effect
  • DR100%, DR200% - this is a clever feature from Fuji (See this article for more info)

EM5 II with the Lumix 35-100mm f2.8 lens - ISO200, f5.6, 1/250 - Raw file converted in WS - I added a Chrome effect with the Color Creator.


Is it possible to use Fujix Weekly Color Filters with the EM5 III? We first need to study the Fuji Film Simulations and their descriptions. The next step is to replicate Fuji Film Simulations for the EM5 III. Some presenters say it's possible with the OMD and PEN cameras. I found these Fuji film simulations are too complex for OMD cameras. Only the Pen-F, E-P7, or Workspace will replicate them.

For example, the Classic Chrome Simulation description says, "slightly desaturated colors (reds and greens) with stronger shadow contrasts for dramatic lighting, retro-style subjects, and reportage projects." It's a safe place to start replicating these Classic Chrome Film attributes with something like the Olympus EM10 II or the EM5 II. These are the settings I used:
  • Desaturated Colors - Select the Muted Picture Mode plus A -2 and G -2 (SCP)
  • Desaturated Colors - Go to the SCP and set the RGB setting to -2
  • Harder Shadow Contrasts - Select Highlights +2, Shadows -3, and mid-tones -2
  • We can do more with the Pen-F because it's better at adjusting individual colors.

The above settings replicate only the Classic Chrome Film Simulation. The Kodachrome 64 Filter settings have to be added on top of that. This is a process of working on the different parameters until you reach the right look. I tested the above profile with my EM5 II against the XT-5. I could only get approximately 85% of the Classic Chrome simulation with my EM5 II. I also used the Color Creator to create a Chrome effect with the following settings: Color = 2 and Vividness = -2.


Fuji X-T5 with 27mm f2.8 lens - ISO400, f5.6, 1/1100 (Provia/Standard).


Olympus EM5 II Kodachrome 64 Profile

  • Picture Mode: Muted (See this video)
  • Grain Effect: Set the max ISO to ISO1600
  • Color Chrome: Use the Color Creator (See this article)
  • White Balance "Daylight": (A 0) and (G -7)
  • Highlight: +2
  • Shadow: -3
  • Midtones: -2 (Adjust between -1 to -2)
  • Gradation: Normal
  • Color: -1 (RGB)
  • Sharpness: +1
  • Noise Reduction: None
  • Clarity: Can be added in Workspace (Enhanced Raw File)
  • Auto ISO up to ISO2000 (fixed)
  • Exposure Compensation: 0 to +2/3 EV

The main difference between Olympus and other cameras is the Pen F and the Pen E-P7. The "Color Adjust" and Monochrome Profile functions are far superior. I am not planning to copy more Fuji film simulations or Fujix Weekly Filters for Olympus cameras. Your best option is to buy a secondhand Fuji camera like the XT-20/30 if you like to try Film simulations or Fujix Filters...


Olympus EM5 II with Lumix 12-35mm f2.8 lens - ISO200, f6.3, 1/400 - Raw edited in WS with Color Creator.


4. Color and Monochrome Profiles


This is the final article in this 6-part series discussing Color and Creative Photography. Did you know all the color settings on your Olympus camera are available in Workspace and the Enhanced Raw Format? It's possible to tweak your Color Creator, Color Profiles, and Monochrome Profiles in Workspace. It's the only raw converter that accesses the camera's Art Processor.

I decided to rewrite this section and focus on one question only. What do we need to develop profiles, and what are the main steps when creating color or monochrome profiles?

I did only a few color profiles because I prefer how photographers benefit from learning to work with color. I hate to be the reason why photographers accept things like the "size and capture" theory. Some of the most critical skills in the modern age are critical thinking and a creative mind...

4.1 The Color Wheel


The Color Creator, the Adjust Color, and the Monochrome Profile functions are all based on the RGB Color Wheel. I created the one below as I studied my new Pen-F. I learned much from designing the color wheel and adding the specific Olympus information on the Color Wheel.

Do we need a Color Wheel like this? We don't need one because the Color Creator, the Adjust Color, and Monochrome Color Wheels are similar. These functions can be used to make quick decisions, like finding opposite colors or color harmonies. See this article for more about the Color Wheel, Opposite Colors, and Color Harmonies.

Opposite Colors are critical for Olympus. For example, how does one adjust the White Balance setting with the Green and Amber options in the SCP? Cameras like Fuji or Panasonic use a nifty color matrix function to fine-tune the WB. It relies on Opposite Colors and the Color Wheel. I added the Olympus WB adjust sliders to the Color Wheel. The opposite of amber is blue, and green is magenta. Positive values change the colors amber and green, and negative values are magenta and blue. Study the WB adjust sliders on the color wheel. Also, study the WB sliders in Workspace.


4.2 What do we need for Color Profiles?


Practice with the Color and Creative Photography functions as much as possible. Master your Olympus camera functions and Workspace. For example, do you visualize concepts like the SNR to ISO ratio or any adjustments for the Color Creator? Do you use the Color Creator?

The following illustration summarizes the Color and Creative Photography features of Olympus. We can create Color Monochrome Profiles in the camera or with Workspace. The Enhanced RAW Format helps us to test our profiles on our PCs. The only differences between Olympus cameras and Workspace are Tone Curves adjustments and the Hue and Brightness sliders for the Color Adjust function in Workspace. Only Workspace will combine multiple options like ART and Color Filters. 


The video below discusses Color and Creative editing examples. Also, see this video on how to edit your images in Workspace. These two videos give a good introduction and advanced overview of Workspace. The secret is to spend time and do lots of editing and practicing with Workspace. YouTube selected a lower resolution for this video. Goto settings and set the resolution to 1080p.


The following YouTube Video gives a short introduction and overview of FujiFilm X Raw Studio. The information will help you to see the differences. The sound is not OK. I am planning to do more recordings on Fuji.


5. Conclusion


My goal was to assist readers in learning more about the Color and Creative Photography features of Olympus. Yes, we can get similar results with Lightroom or Photoshop, but having your camera settings available in Workspace is super special. Workspace, therefore, requires a different editing style that needs time to practice and master. Workspace also works best for photographers who do things right with their cameras. Workspace is NOT a rescue package for incorrectly exposed images...

The benefit of regularly working with Workspace is your editing skills and ability to develop color profiles improve. See this article (Technique 19) for more on Workspace and working in Live View. 

It's becoming more difficult to find secondhand Pen-F cameras in excellent condition. Get yourself a Pen-F or the EP-7 if you find one in good condition. These cameras will continue to be the ultimate creative color tools for Photographers. The E-P7 and its excellent image quality are a good choice.

Here are the first 5 articles in this series below:-

  • A new color strategy from Olympus, Part 1 - link
  • Digital Cameras and Color Accuracy, Part 2 - link
  • Color Wheel and Olympus Color Creator, Part 3 - link
  • The Color Profile function in WorkSpace, Part 4 - link
  • Using your camera and editing in WorkSpace, Part 5 - link


Jun 17, 2018

The Color Wheel and Olympus Color - Part 3

Last Update:- 11th April 2021


Olympus EM1 II with 7-14mm f2.8 - ISO64, f8, 1/160 (Edited with Viewer 3)


Introduction to Olympus


Hobby photographers are typically forced to work on their portrait skills when asked to do a wedding or photo shoot. They consider portrait locations, colors, and the clothes they like to see for the photo shoot. This article reviews the different color features we have with Olympus.

The first article in this series hinted that photographers focus too much on camera specifications. For example, most digital photographers want more Dynamic Range, perfect IQ (details), perfect lenses, less image noise, and NO highlight clipping.


It is OK to ignore those "perfect" specifications and regard your camera as the ultimate 
creative tool. You should always experiment with your camera to develop your 
unique skillset. That said, it's no secret why younger photographers
 dominate social media with mostly their mobile phones.


Olympus OMD and PEN cameras offer a broad range of creative possibilities. They offer a collection of Creative features that help us create impressions of our daily experiences.

List of Olympus' Creative Features: (All of these are available with the Pen F & EP-7)
  1. ART Filters (EP-7 has the latest features)
  2. SCN Modes (Pen F, you need to assign SCN modes to C4)
  3. Color Creator (Pen-F - Creative Dial, EP-7 - AP Button)
  4. Color Profile (Pen-F - Creative Dial, EP-7 - Color/Mono Lever)
  5. Monochrome Profile (Pen-F - Creative Dial, EP-7 - Color/Mono Lever)
  6. Different White Balance options & fine-tuning
  7. Shadows and Highlight adjustments (Tweaking the Tone Curve)
  8. Several options to adapt SCN and ART filters
  9. Various in-camera HDR Modes
  10. Video and Time Lapse options & filters
  11. Multiple images and the Image Overlay function
  12. Several blue-hour options or long-exposure photography
  13. High Res Imaging - (Pen F only - Functions also as a creative feature)
  14. Standard image adjustments (Saturation, Sharpness, Contrast)
  15. Gradation (High Key, Low Key, Normal, and Auto)
  16. In-camera RAW editing (other editing options also available)
  17. My Clips video mode (including slow motion)
  18. Image storytelling with different image templates - Pen F
  19. Standard PASM exposure modes
  20. e-Portrait for softer skin tones
  21. Various Bracketing options (HDR, Focus Stacking, and more)
  22. Multiple Flash photography options


A quick introduction to Color with Olympus


Olympus selected a regular Color Wheel to enable functions like the Olympus Color Creator. That means we can access lots of experience from the existing Color Wheel. It was challenging to familiarize myself with most new concepts like Color Harmonies. The Enhanced Raw Format and Workspace helped me to experiment with the different color functions from Olympus. I use the Color Creator, Color Filters, and Adjust Color tools each week in my camera or Workspace...

For example, I thought it was only another feature when I first saw the Color Creator on my EM-5 MKII. Like any new function, I could not see the value of the Color Creator. Studying color and basic concepts like color harmonies was similar to always using Auto Exposure and changing to Manual Exposure. It's always a process of learning and trying new techniques and features.


This Color Wheel mimics the color wheel in Olympus cameras. The outside diameter shows different hues (colors) at 100% saturation. This color wheel is based on an Additive Model and is white in the center. This Color Wheel's primary colors are Red, Green, and Blue, and the secondary colors are Magenta, Cyan, and Yellow. You will find the monochrome colors market on the outside diameter. The top half of the Color Wheel shows warm colors and the lower half cold colors.

I also added the Olympus White Balance information on the Color Wheel. This enables us to visualize the effect of adjustments like CWB (Custom White Balance). I also added the WB compensation "sliders" to this Color Wheel. See the camera's SCP (Super Control Panel).

The Color Wheel helps us to create color harmonies. We can use the Color Wheel to find harmonious color combinations (further down) for our photo shoot. Most OMD and PEN cameras from Olympus have the Color Creator (Color Wheel) function.


I learned about color harmonies when I created my first website in 2007. Some designers claim that colors impact your views more than content. Golden sunrise or sunset photos create positive reactions, and pastel colors are more pleasing to younger viewers than bright colors. Do you only focus on your subject, or do you also consider the colors in the background of your photo?

Why do we have RGB, CYM, or RYB (Painter) Colors? Red, Green, and Blue (RGB) are the Primary Colors in the above Color Wheel, and Cyan, Yellow, and Magenta (CYM) are Secondary Colors. You will find a short summary of the Color Wheel in the video below.


An interesting video explaining the Color Wheel.

Opposite Colors are used with the color functions available in Olympus cameras. For example, the Color Creator and the White Balance function use Opposite Colors. For example, how do we identify color casts, and how do we correct them? We use opposite colors to correct color casts. A unique difference between photography and videography is photographers typically like to have neutral colors, and videographers are more inclined to use Color Profiles.

Photographers work with subtractive and additive colors. Electronic equipment (TVs) use RGB colors to create color. This is called an Additive System. CYM colors are reflected (Reflected Light) from paint or printed media when illuminated. This is called a Subtractive System


How do we apply these two color systems in digital photography? The image signal (Reflected Light) passes through the lens and consists of additive colors. The sensor captures the reflected light, and the image processor converts it into RGB colors. Your PC screen uses RGB colors to display color.


What happens if we mix RGB and CYM colors equally? The resulting RGB mix will be white, and the CYM mix black. See the above image. Also, see this article. Which other Color Combinations are available to Olympus photographers if the Color Creator and the White Balance function are based on opposite colors? See this website for more information on color pallets.


There are 6 handy Color Combinations in the above illustration. They are primary, analogous, secondary, complementary, intermediate, and split complementary color combinations. Photographers create color pallets to harmonize the color combinations for an image. Photographers use complementary or opposite colors for projects when they target two colors. For example, magenta with green or yellow with blue are complementary colors. Yellow with green or red with magenta are analogous colors. Study this "must-see" video.

Why would photographers create a color cast? Color helps photographers to create specific emotions or emphasize unique situations. For example, we can set our Olympus cameras to warm or neutral colors in artificial lighting. We can also correct warm color casts with the Color Creator.

Tiny color adjustments are more effective...


It's critical to apply tiny steps with functions like the Color Creator. Study the effect first before making another adjustment. The Pen-F gives us a choice between 4 or 6 adjustments. That means each step equates to an adjustment of 25% or 15%. These are NOT increments, especially 2 steps.

WorkSpace offers a great way to familiarize yourself with functions like the Color Creator, the Color Adjust (Profile), and the Monochrome Profile. The visual feedback with Workspace is also superior. It's simply impossible to effectively practice on a camera display...

Different Image manipulation options


I edited the above image in Photoshop. The yellow subject in the front was edited separately from the background. The final image style consists of a vivid subject against a desaturated background. This was a popular image style for Instagram. It's not possible to create similar results with Workspace.

Different Image effects for the Olympus Color Creator? 


You will see the Color Creator works best with opposite colors. One typically targets a dominant color in the image. A quick test is to decrease the targetted color's vividness with -4 steps. You will see both the targetted and opposite colors change.

Study the following examples with 2 colors:-


The above image has two dominant colors. Both can become targetted colors. I selected the color blue as my targetted color in this example. The Color Creator's effect is instantaneous. The vividness of the targetted color increases and the opposite color will be less vivid. These effects increase with each adjustment. Always check and evaluate your image after each adjustment.


I increased the vivid setting by one step in the above image. The targetted color is a mix between the colors blue and cyan. We can see the effect of this adjustment in the sky and the leaves. The opposite color is a mix between the colors yellow and orange. The colors green and brown are more when we decrease yellow and orange. One can see this effect in the above image...


I targeted the color yellow in the above example. That means the color blue was the opposite color. You can test your knowledge by explaining the effects in the above image. The changes will be the opposite of what we saw in the first image...


I increased the vivid setting of yellow/orange to +2. This lightened the cyan/blue (sky) while adding more yellow/orange to the leaves. The colors cyan and orange were the more dominant colors.


The above image is an interesting example. I increased the Color Creator setting with one step and used the WB compensation sliders to up the color blue. It's possible to explain the above effects as we did with the first three examples. Also, see the article I did on the Color Creator.

My next article will focus on Color Profiles and how to use Color Harmony Templates to create image profiles. Until the next time, have fun and have fun practicing.

Which color functions are available in WorkSpace and Olympus cameras? We can activate the used camera functions in WorkSpace. All the adjustments are available when we edit jpegs in Workspace. See the RAW file compatibility list below:


I haven't had an opportunity to test the EM5 III or the EM1 III, or the EM1X

May 13, 2018

Digital cameras and Color Accuracy - Part 2

Last update:- 28th July 2023


Cape Town (2013) - Taken with the original OMD EM-5 and the MZuiko 12mm f2.0 Lens

Was Olympus overconfident, or did they take a chance with the new Olympus PEN-F? To review this question, we need to discuss the different creative features of a selection of cameras? For example, how does the Olympus Pen-F compare to the Fuji X100F? A fair comparison needs a good understanding of different manufacturers and a hands-on evaluation of the various cameras.

I will compare different cameras in this article. I have experience with Panasonic, Olympus, and some Fuji cameras. I used Canon's 350D, 40D, and their Powershot compacts. I do not have experience with Nikon. Fortunately, my son used Canon professionally, and in 2016 he changed to Sony. I used the A7 II and the A7 III for a few months and tried the A1, A7R IV, and A7S III.

I decided to target cameras from 2016, like the Nikon D500, Canon 80D, Sony A7II, Panasonic GX8, and the Fuji X-T10. Please let me know if I misrepresented anything on these cameras.

I was surprised at the differences between these manufacturers after studying them. Especially the differences in configuring and the advanced features of each brand. At the same time, basic adjustments like white balance and shifting the white balance were similar for these cameras. I found it interesting how photographers and videographers manage color effects from little in-camera adjustments. It's also interesting to see the influence "Color Science" has on brand loyalty. For example, which of Fuji, Canon, or Olympus has the best "Color Science?"

The goal was NOT to determine which camera is the best... 

My goal was to compare the creative camera features of each brand. Spare a few minutes and watch the video below. Listen carefully to the 3 guys, identify their personal brand loyalties, and how this influence each of them. In fact, it's fun to watch them "objectively" discuss these cameras.


Comparing the Canon 5D IV and the Sony 7RIII.

The importance of setting the White Balance correctly and its part in achieving the right image colors are covered in the above video. The video also shows it's critical to always discuss the importance of variables like the correct exposure values and White Balance values. 

Why is the White Balance important?


Accurate image colors start with the correct Exposure and White Balance settings. It's so important to differentiate between Creative Photography and having accurate colors. You will find more information in my article discussing the Gradation Function of Olympus.

The first article of this 6-Part series explained the image creation process in the camera. We studied how the camera uses the white balance to create color images. Experienced photographers learned how to spot Color Casts or faulty white balance values. Each photographer should practice the art of spotting and identifying specific color casts with digital photography.

White balance settings are not only a critical setting for digital cameras, but they are also important when you convert your general raw or Olympus Enhanced Raw Files.

Making videos also highlighted the importance of using accurate WB values. For example, study the progress of Panasonic with the GH1 to the GH6. The video below is an example of videographers using the in-camera settings to create color profiles in the camera.


The takeaway from the above video is that most photographers need a unique style,
signature, or brand. The reason is customers like to know what to expect from
photographers. An inconsistent photography style is unprofessional. 


Videographers differentiate between in-camera color features and color grading the video in post. Each photographer should master in-camera color adjustments and the ability to edit or color-grade videos in post-processing. I found the following video while searching for information on Canon. It is an example of how the photographer used the digital camera and traditional color features to create in-camera color profiles. Does this apply to photographers? Yes, only the terminology is different.


White balance is critical if you need accurate colors. For example, photographers use the white balance to create color effects. The first steps in working successfully with color are knowledge and practice. Practice how to spot color or the white balance for different situations. It's good to practice and experiment by manually selecting the camera's white balance in different situations.


Any White Balance values impact JPEG files. All White Balance and WB shift adjustments can be
corrected with RAW files. This allows photographers to safely experiment with the WB.


Below is a summary of the comparison I did on the above cameras. I bundled the color features into groups. The standard in-camera adjustments are at the top, and all the specialized features on the bottom. I also listed the editing software options at the bottom. Click on the image for a large view.


Camera manufacturers are at a point where they produce excellent image quality. Higher-resolution sensors add more detail but do not improve image quality. We also established that the "size and capture" theory is part of a marketing strategy that sells more full-frame cameras. We also know all image sensors come with a noise floor. We also know that we control image noise with the SNR-to-ISO ratio. The main differences between cameras are the unique features that improve our success rate with a specific camera or brand. Our challenge is the right camera for the application...

Color and the ability to control color are critical differentiators for 2023. Fuji cameras are a great example. Olympus started its Color and Creative Strategy in the 90s. The Pen-F and EP-7 were the first cameras offering a "full set" of Creative Features. No other camera offers this level of control. Unfortunately, Olympus sold its camera business, and we might never experience the finish line...

May 5, 2018

A new Color strategy from Olympus - Part 1

Last update:- 27th July 2023

Preparing for this 6-Part series on Color and Creative Photography, I saw many YouTube videos and camera reviews. I was interested in what reviewers and experts say about the new color features from Olympus. For example, Olympus introduced the Color Creator with the EM1 and the EM5 II. The establishment's reaction was cold with comments like... "Have you seen that Creative Dial?" A few ventured beyond the physical dial and the accompanying news release, saying it could be the start of a new Color and Creative Photography Experience for M43 cameras.


The revolutionary Olympus PEN F - the camera that separated creative photographers.


This series illustrates the importance of having good color skills. I am focussing on the Pen F and OMD cameras to lead photographers in the new Creative Color Strategy from Olympus. This update to the 6-Part series is 5 years since I wrote the first article in January 2018. In the 5 years following, my experience with the Creative Color Strategy from Olympus improved to the point that it became part of my daily photography experience with the Pen-F, OMD, and Workspace.

Was the Pen-F a successful camera, or will it only reach its full potential in the secondhand market? The Pen-F was a huge success judging its used pricing and popularity amongst Pen-F owners. This 6-part series on Creative Color and Digital Photography also became my most popular articles.


Olympus Color Creator


Some reviewers praised the PEN-F with comments like a "Gold Award Product, Great Product, Editors Choice, Remarkable, Great Design, and Retro Design." Other reviewers evaluated the Pen-F through the lens of "must-have" marketing "filters" like sensor size, image noise, dynamic range, articulated display, and EVF resolution. Most forum experts follow the latter group and complain about the Pen-F Menu, the lack of 4K, and the all-important MIC input and Headphone output.

Did Olympus do a proper job of promoting the Creative Dial and its Creative Color Strategy? The Pen F had the chance to be an enabler of creative color photography. Instead of fighting and winning, Olympus decided to sell its camera business to a financial group. OM-System became the new owner of an Imaging Business with a history of designing exceptional cameras. Will we only read about this leading camera brand, or did OM-System offer a credible plan to win this race..?


Olympus PEN F Creative Dial was too much for most...


Olympus was always known for its true colors, Canon for its color "science" and silky smooth images, Nikon for the D4 and the D850, and Sony for its A7 series of full-frame mirrorless cameras and high-resolution Stacked BSI sensors. Fuji started a significant following with the XT-1 and became one of the leading manufacturers of mirrorless cameras.

Olympus never followed the "size and capture" theory but designed innovative photography features like the Creative Color Strategy. If you recall, Olympus placed IBIS on the map and was the first manufacturer to introduce Hi-Ress imaging or a Live View solution for DSLR cameras. Olympus and Panasonic shared the vision and pioneered the mirrorless segment in 2008. Today all manufacturers have mirrorless cameras, and DSLR cameras are only a small niche segment. The Olympus brand is associated with leadership, new technologies, and new trends.

It's now 3-years since Olympus signed an agreement with OM-System and sold its Imaging Business. What are we learning from this? You cannot sell your corporate identity and values.


EM1 II image edited with WorkSpace.


As this series about the Creative Color Strategy from Olympus develops, you will learn more about the different color features from Olympus, like the Color Creator, the Color Profile Tool, and the Monochrome Profile Tool. Photographers will also learn more about the importance of knowing color in both Black & White and Color photography.

How does the Image Processor create a digital image?


Only some photographers know the image sensor captures "black & white" data. To explain this, we will take a closer look at the image signal path from the subject to the sensor:
  1. The image signal enters the lens and goes through the lens to the image sensor
  2. At the sensor, it goes through an RGB filter to remove all the color (RGB) data
  3. The image sensor records the remaining grayscale data and sends it to the CPU
  4. The CPU process the WB, RGB filter info, plus the sensor data into a jpeg file
  5. The camera or CPU processes the B&W image data into a Digital Color Image
  6. The only Color Variable photographers can access is the White Balance setting


Digital Camera Sensor and RGB Filter.


Let's discuss the image signal path from the sensor to the SD card? The recorded grayscale data from the sensor is converted to a digital color image and saved on an SD card. The Image Processor creates a color image from the White Balance data, RGB Filter, and Image Signal from the sensor.

This process explains the RAW file. A basic RAW file consists of the recorded grayscale image data, the RGB filter data, and the camera's White Balance reading. The TruePic Image Processor (CPU) or Workspace converts this raw data into a jpeg (color) image. One of the biggest secrets is the details or Color profiles manufacturers use to convert raw data into digital color images.

That said, studying and actively using my Pen-F, WorkSpace, and other Olympus cameras, I learned enough to understand the Color and Creative Photography functions from Olympus. This includes the unique access we via with color features to the TruePic image-building process. Olympus created a window for photographers to access the camera's image processing. Known as Live View, this is one of the most exciting discoveries I made on the Pen-F. Study the Live View section of this article when you are done with this article.


Knowing this, it's even more significant how Olympus connected functions like the Color Creator, the different Tonal Adjustments, and the Creative Dial to the image processor. This allows photographers to personalize their photography experience and results with Olympus cameras.

Knowledge of B&W photography and the early days of color photography is enough to appreciate digital image processing. Olympus linked its Color and Monochrome profile features to the camera's image processor. This changes how photographers develop their unique photography style. Tools like Color Profiles, ART Filters, Multiple Exposures, Highlights & Shadows (Tone Curves), and the Color Creator enable creative photographers in a new but unique way.

The OMD and PEN-F's new color and monochrome functions are also part of WorkSpace. In fact, we saw that WorkSpace and Olympus cameras have the same image processing. This is good news because it assists us in developing, testing, and fine-tuning any color or monochrome profiles with our PCs. Olympus designed the Viewer/Workspace Software as a part of the digital camera...


Taken with the PEN F at island Mainau, Bodensee.

We need a mental shift and add the Olympus Creative and Color processing features to our photography. Digital photographers need a good understanding of color and how to work with color. The first step is to study the Color Wheel and learn how other artists work with the color wheel.

There are more videos on YouTube with information on the artist Color Wheel. Please familiarize yourself with the color wheel. Also, see the video below. The presenter is a well-known Photographer!!


Powerful video explaining the Color Wheel and photography.


VideoPic Blog Comments

Please add any comments to this article here.

Most read Articles