ISO64: Why is ISO64 an interesting option? It simply means less ISO amplification and better aperture control in bright sunlight...

May 10, 2022

The "size and capture" theory and Marketing?

Last Update:- 6th August 2023 

Is the image quality the same for the Sony A7R IV/V in Full Frame or APC mode? We are reviewing the replies one will receive from most photographers and sensor manufacturers.

I also added 2 parts from a previous article I never completed:- 

  1. How to determine and match your photography needs to a new camera
  2. Basic description of what and how to test or evaluate different cameras


These are the typical replies from camera reviewers or manufacturers:

1. Why should my image quality stay the same? The pixel area and sensor sensitivity of the Sony A7R IV/V does not change from Full-Frame to APC mode. The sensor's Absolute Sensitivity Threshold stays the same. The resolution will reduce because the APC crop has fewer pixels. The sensor's total area and luminance perspective also change in APC mode. In fact, the sensor's noise floor might be smaller with fewer "active" pixels in the image signal pathway. Study this article.

2. Why should my image quality change? APC sensors are smaller than full-frame sensors and capture less light (See DPReview Fuji/M43 camera reviews). Crop sensors have less image quality, less dynamic range, and more image noise. (The "size and capture" theory became the norm for camera reviews, editorial articles, and forum discussions from 2012 onwards)


Is this the same image sensor as in the G9? Will the LX100 II have less IQ with only 17MP?


Test your knowledge and related experience. Photographers who read my articles are comfortable with the terms used in technical papers discussing digital cameras or image sensors. Those relying on camera reviewers for information refuse to discuss theoretically based information...

Have you ever wondered why the increase in autofocus and quality complaints if Olympus, Fuji, or Panasonic launched a new camera? Forum and YouTube "crisis" reports rapidly increase each time one of these manufacturers launches a new product? Is this normal or counter-marketing..?


The marketing community offers only one perspective of fill capacity, the one that supports their narrative...


Is the "size and capture" theory more detailed in 2023 than in 2012? M43 mirrorless camera sales did well from 2008 and when Olympus launched the first OMD in 2012. The "size and capture" counter-marketing program successfully established many marketing filters to negatively influence M43 sales. Like similar marketing campaigns, the "size and capture" theory stayed the same.

Camera reviewers did use basic engineering principles before 2012. The "size and capture" theory was introduced in 2012. Follow camera reviews on DPRewiew for more information. An example of changing statements is Sony cameras and BSI sensors. The introduction and excitement with the Sony A7R II and the following claims saying BSI sensors make no difference. Technical claims and statements changed when marketers disregarded basic engineering principles and started pushing the "size and capture" theory with phrases like large sensors have better IQ or "BSI sensors do nothing for IQ."

Why would a "respected" reviewer claim image sensors do not improve? Why would they refuse to discuss IQ improvements from one generation sensor to the next? For example, they write the Sony A7 III has the "same" IQ as the A7 IV. Does that mean 37% more and improved A7 IV pixels did nothing? As one studies some of the statements reviewers make, you realize...

Another example is Image Processors. Camera reviewers won't discuss the benefits of having better and faster image processors. For instance, older camera reviews were more informative when comparing this recent review promoting the idea that the Canon R5 is the "perfect" camera. No reasons why and no supporting information as to why the R5 was labeled the perfect camera. And then we see feedback from what seems like real examples and something that really happened...


The Olympus E-P3 with the original 17mm f2.8 lens. A great camera with a good IQ, but failing all reviews in 2022.


What is happening, and what is the link to Corporate Marketing?


We are discussing two marketing models. I guess readers ask why is this important? Because it's one of the most important trends in modern marketing. Modern marketers moved away from the traditional 4 Ps and replaced it with a more aggressive marketing model. This new marketing model does not only change each camera purchase we make but potentially influences every decision we make...

Reviewers will never discuss the full potential of new cameras. For example, they focus on the negatives and ignore any benefits of having features like High-Resolution Mode. Why is this happening? Let's assume I am promoting a customer relationship (CRM) solution to a corporate client. I need to give accurate estimates of the improvements my customer can expect. The marketing concepts used in modern marketing are highly effective and efficient in controlling information.

See the example of gatekeepers and moderators prohibiting discussions outside the promoted "size and capture" statements or the narrative. The video and forum discussion.


What is the reality (set of filters) you accepted as truth?


The two programs we see from this new marketing method are the "size and capture" theory and a new type of counter-marketing in the photography segment. Both support the new "science" with strict controls on messaging and communications. We discussed the "size and capture" theory in previous articles. The next subject is counter-marketing and modern  Marketing Communications.


Why is repetition so critical? People value familiarity, consistency, and trusted advisors. People are more inclined to trust marketing lines from trusted advisors. The informed eye recognizes "paid" repetitions or phrases like "smaller sensors have more noise" recurring in almost every crop sensor review. That's why we always see the same reporting on public News Channels...

If you are new to the Decision-Making Process, study this link.

People don't expect to find undisclosed promotions because companies are regulated for our protection. We are "safe" and do not need to worry about subliminal and undisclosed promotions programming us subconsciously. How does this protection work for you?

For example, it's an open secret that photography websites list keywords and phrases to promote the "size and capture" theory. We see this in camera reviews, forum posts, and editorials about photography. In fact, many photography sites partner with marketing companies to create and promote new keywords and "fact" statements. In contrast, independent sites like this blog apply the same technical principles and language as used among sensor manufacturers.


Governments and large corporations found ways to distance themselves from any legal, regulatory, or ethical obligations of advertising on social media. They transferred their day-to-day marketing to 3rd parties. Most NGOs and 3rd parties specialize in "astroturfing" and undisclosed promotions.

Is astroturfing a form of deception? Wikipedia explains "deception" as:

Falsehood is a statement that misleads, hides the truth, or promotes a belief, concept, or idea that's not true. It's often done for personal gain or advantage. Deception can involve dissimulation, propaganda or sleight of hand, distraction, camouflage, or concealment.


Olympus Pen F with 60mm f2.8 Macro lens - 80MP high-resolution image - Color Creator - Edited with WS.


Many OM-1 reviews look like counter-marketing promoters posing as friendly and trusted advisors. The success or failure of a new product or service is no longer the sole responsibility of corporate marketing teams. For example, the new OM-1 became an instant hit. I never saw any camera with this high level of success in the initial launch period. OM-System couldn't forecast or deliver the first weeks following the official launch. 

Here are a few "trusted advisor" inputs from your friendly OM-1 camera reviewers:- 
  • Expect to see inaccurate info on the sensor and technology (I talked about this)
  • The viewfinder - similar to the EM1X, seems like the EVF will be targeted...
  • Repeatedly referring to only 20MP, small M43 sensor size, lower DR plus, plus
  • The trend is reviewers isolate the M43 format as the lesser format with less IQ
  • See how this forum reacts to views they do not support. Gatekeepers reacting...
    • Gatekeepers repeating "facts" they "established" during the launch
  • "Grassroots" operators posting their complaints on photography forums:-
    • Interesting with Canon R7 and R10 launch - link1link2link3link4
      • Repeating the same "fact" statements again and again and again...
      • You always see the same old gatekeepers and promoters at work...
  • Marketers created new "facts" from the 1st day following the OM-1 launch...

The EM1X stirred up an instant reaction when it was launched in 2019. Competitive marketers used every counter-marketing argument they could find. The phrases and repetitions in forums and reviews were outrageous. In contrast to the overly negative EM1X image, we have a review from an actual EM1X owner or Olympus Pro Photographer. The same was happening to the OM-1.

For more on counter-marketing and undisclosed promoters, watch this video.


Are you familiar with Astroturfing? It's something that happens every day?

How do counter marketers create and establish "fact" statements?


The above video is an introduction to modern marketing tactics. It's all about messaging, repetition, and consistency. Creating and introducing new keywords and fact statements are ongoing activities. The focus is counter-marketing and "fact" statements in this part of the article.

For example, forum posters, reviewers, and talking heads will repeat "fact statements" like:-

  • The EM1 III is not much different from the EM1 II or the EM5 III
  • The new OM-1 randomly loses its AF, and it cannot be explained
  • All OM-1 problems will be fixed with the next firmware update
  • The EM1 III has good video features, but the recordings are soft
  • OMDS lied about the 2EV noise reduction, and they cannot be trusted
  • The menus on M43 Olympus cameras are not logical or user friendly
  • Composite and computational features - "With no movement in the scene."
  • The GH6 is good, but it continues to suffer from an underperforming AF

Another example is the same OM-1 counter-marketers running the counter-marketing campaign on the Fuji XT-5. Follow the X-T5 discussion on social media (forums & reviews).


Olympus Pen F with 17mm f1.8 (All the camera images in this article were taken with the EM1 III and focus bracketing)


Not all repetitive comments are part of an ongoing marketing program. Often, it's simply fanboys parroting any "popular" narrative. This can be an advantage or a real problem for marketers. This is how people discover patterns or question the message.

What is a new fact statement or marketing filter? It's something like "the OM-1 loses AF". "Fact statements" are repeated until consumers accept it as fact. It's used on social media and camera reviews to discuss and discredit competitor products. How do we know a new fact statement is ready for use? When it's applied in forum posts and reviews as "normal" fact statements.


A typically established fact is "M43 lenses suffer from lens diffraction."


For example:- (See the final comments in my conclusion)

  • This respected bird photographer repeats a "fact" with no explanation or examples - link
  • The same bird photographer finally selected the OM-1 by giving interesting reasons - link
  • This bird photographer thoroughly discusses his Olympus cameras with examples - link
  • The 150 - 400mm Pro lens. Track the dynamics with gatekeepers and promoters - link.


EM10 II with 12-45mm f4 lens - ISO200, f4.0, 1/125, Exp-shift +1/3 EV, Enhanced Raw converted in WS and edited in PS

What would you say if I told you the above 150-400mm pro lens question is an example of discrediting products? Shouldn't people ask questions like, did you talk to the manufacturer, or reject the question if no RAW data is available? Will photographers accept that the highly acclaimed Pro wildlife lens has quality problems? You need to think like a marketer. Did they establish a new fact statement? This complete discussion was probably generated by one person in a marketing office...


Another example is the 9-18mm f4.0 Zuiko wide-angle lens. This is an exciting M-Zuiko lens from Olympus, especially considering the lens glass elements, image quality, and size. This lens is discredited because the original EM5 MKI had a shutter shock problem. The 9-18mm went from most popular to "be aware" in those days. Olympus fixed the shutter shock problem but the...

Here is an example of a photographer opening a new discussion. I studied this forum and followed the marketers (undisclosed promoters) posting as grassroots or everyday photographers. Gatekeepers distract any argument that challenges the narrative. The dynamics on these forums are interesting as they demonstrate the general distrust towards the "size and capture" theory...

Folks, "established facts" (filters) are never explained when challenged. Expect replies like, we discussed this in length, and I do not see any good reason to repeat the discussion...


Real photographers like this camera, and I see why...  Why are counter-marketing programs discrediting the X-T4?


Conclusion

Why do many "photographers" discuss a forum question without supporting details or information? Are these staged discussions or counter-marketing actions? Why not present the data they tested while trying to solve the problem? I hope this article increased your awareness or ability to spot undisclosed promotions. Always ask for more information and ignore those forum questions without images or supporting data about the problem. See this example and this one of a typical counter-marketing promotion on forums. Also, see this example. How many people do they need to stage forum discussions like these? One or two marketers?

An alternative way of navigating information is to target specific topics with your search criteria. For example, if you need information about focus bracketing and the EM1 III, search for "EM1 III Focus Bracketing". Use general search criteria if you are OK with undisclosed and paid promotions.

Some folks are more interested in technical specifications, while others rely on the features and the user experience of using a new camera. We see a mix of this from the bird photographers Mike Lane and Roger Hance. Mike said something interesting when he suggested image quality is no longer an issue as all modern cameras have good Image Quality. I fully agree with him.


Andrew Goodall explains another aspect of photography that marketers distort.


If correct, what are the differences we should look for between cameras? Many factors influence the purchasing decisions photographers make. Some are more perceptual, like what's in my camera bag, and others are features and functions like the two bird photographers. 

Do you think Mike Lane just said, "The OM-1 loses AF," or did he subconsciously spend more time on the "facts" presented as potential OM-1 problems? How would someone with less experience than Mike react to these counter-marketing statements?

Why not simply tell the truth? Why not present the correct information? Why not train photographers so that everyone has a good understanding of digital cameras and digital photography? People invest more time in preparation for the truth. Think of a few everyday examples...

F-Stoppers posted an example of how the Sony A7R IV user (grassroots) rating dropped from 4.8 to only 2.5 after they removed all the fake and promotional reviews.

Here you see a quick example of a "supervisor" asking why there are no current complaints about the new Panasonic S5II PDAF. He is basically saying, come on, get the discussion rolling...!

Take care & God's Bless

Siegfried


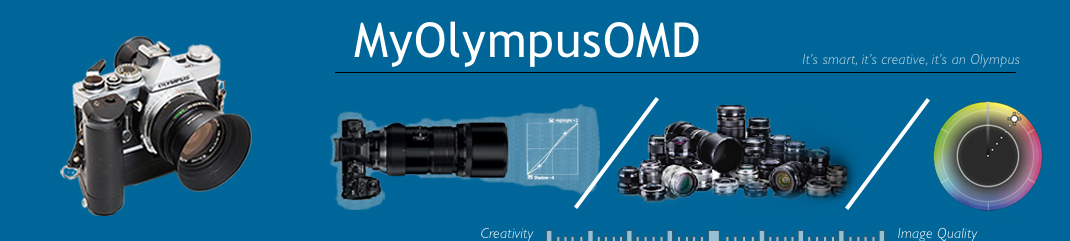
Matching your needs to a new camera


I am discussing two parts in this section:-

  1. How to technically evaluate and compare different cameras
  2. How to plan and search for a new camera (matching your needs with the camera)


1. What tests can we do to compare two or more digital cameras?

Many photographers need help to do basic tests on digital cameras. It is possible because we understand the importance of sensor sensitivity, and the ISO setting does not create noise. For example, typical ISO tests in camera reviews or "Photons to Photos" graphs are nothing more than commercial tools. These tests are meaningless in learning something new about an image sensor or digital camera. 

See the list below for more information on what we like to evaluate on cameras:-

  • Study the history of the camera and the type of sensor used in the camera
  • Does the camera have a new Image Processor or one from a previous model
  • In terms of the image sensor, the following is good to know:
    • The type of sensor - Live MOS and BSI sensors are optically more efficient
    • Quantum Efficiency, or the ability of the sensor to convert photons (shadows)
    • Effective noise control or size of the noise floor in the sensor (sensor design)
    • We like to see an image sensor with a reasonable (+10EV) dynamic range
    • Finally, speed is essential for both photography and video applications
    • Sensor resolution plays a role in terms of the following:
      • More pixels mean a smaller pixel area and possibly less efficient
      • Resolution is a personal requirement (20MP offers a good balance)
      • Higher resolutions are essential for image quality & applications
  • We basically want to check the DR, SNR, Saturation Capacity, and Sensitivity


The X-T4 jpeg is out of the camera. No editing. I only used the Keystone function in PS. The crop was brightened in PS.


The best way to evaluate digital cameras is to study their images. A real-life image has all you need to learn more about the camera. Get a loan camera or ask someone to take a few photos (jpeg and raw). Why do camera reviewers use mono-color backgrounds when they do ISO tests? Mono-color images can be tweaked, like under-exposing and brightening them in Photoshop (upping the visible noise). Normal photos give us a chance to review the highs, the mids, and the shadows. This will tell us more about the image sensor and how the sensor performs at different SNR ratios.

For example, you shouldn't see any noise at the base ISO with the fully exposed (saturated) sensor. If not, check the histogram because it could happen that the image was underexposed. It is good to thoroughly saturate the sensor because it will affect the mids and the lows. Next, study the mid-tones and the shadows and evaluate the following:-

  • How big is the noise floor in the sensor (Benchmark is the OM-1, X-T4, and Panny S5)
  • Sensor efficiency when converting photons (Test the sensor in Low light & high ISOs)
  • How much of the read noise is present (Look for the type of sensor in the camera - MOV)
  • Temporal noise in the sensor (Do a search on " temporal noise" for more information)

Why do we want to evaluate the shadows at higher ISOs? Because it happens that very little reflected light reaches the sensor in the shadows. We want to see the sensor's ability (sensor sensitivity) to record clean data from very l little reflected light reaching the image sensor. 


Temporal & Dark Noise is part of the sensor noise floor.


The above image was taken with an older E-30 and the 14-54mm f2.8-3.5 lens. I activated some of the Enhanced Raw settings in Workspace but left the noise reduction OFF. That means you see the image without noise reduction. I was pleasantly surprised by this older Live MOS sensor. How does it compare to older FF and APC cameras with standard (old-school) CMOS sensors?

Cleaner shadows mean a smaller noise floor and/or a more efficient (QE) image sensor. Increasing the ISO with one-stop (1EV) and repeating the same test will push the sensor more. The goal is not to operate the image sensor at its limits but to study its sensitivity and ability to capture detail. This will tell us a lot about the shadows and low-light performance of the image sensor.

Another challenge sensor manufacturers face is temperature. As little as +1 degree Celcius is enough to have more visible image noise. If you like to see how two cameras perform at higher temperatures, place them in the sun for a few minutes. This will teach us how the camera performs after being in a hot backpack or during video recordings. This also applies to low-light conditions and long exposures. It also tells us how much time the camera needs to cool down.


The Olympus EM5 II Special Edition with the 12mm f2.0 lens - This is a super exciting camera.


How does one test for a +2EV noise and +1EV dynamic range improvement? It can be done with the right know-how and a little common sense. There are 4 things to study about each new camera or sensor. The noise floor, the optical and quantum efficiencies (sensitivity), and the firmware:-

  • Noise Floor - A smaller noise floor will improve the SNR & DR (< 1EV) of the sensor
  • Quantum Efficiency - QE tells us more about the conversion from photons to electrons
  • Optical Efficiency - OM-1 pixel area stayed the same - the sensor QE & OE improved
  • Sensor Sensitivity - To learn more about Image Sensor Sensitivity, study this link.

The saturation capacity and the size of the sensor noise floor teach us more about the dynamic range of the sensor. Saturation capacity is linked to the sensitivity of the sensor. Sensitivity is determined by the Quantum and Optical Efficiency improvements of the sensor. 

It helps to have a good understanding of the digital camera. It enables us to better read launch documents and specifications. For example, the OM-1 launch documents showed that the new sensor has a smaller noise floor than the EM1 III. This is big and can help us when we evaluate these two cameras. The same is true for the Fuji X-T4. In other words, knowing more than "bigger captures more light" enables us to make more informed purchasing decisions.


One of the most practical ways to test your camera is mixed-lighting conditions. For example, take an image of a motorcar. We often find correctly exposed motorcars when looking from the top and underexposed on the side. This means the sensor received different reflected light intensities from the car. Some parts of the sensor will be fully saturated, while others will be less saturated with a smaller SNR. These examples help us to learn more about the sensor in the camera. 

See this article that I did for the EM-1 III, E-P7, X-T4, and X-T5.


EM1 III with 12-45mm f4 - Handheld High Res Shot - Enhanced Raw edited in WS - Why would this image have nearly no noise?

Always try and isolate the function you like to test. If you want to test the effect of the ISO amplifier and the sensor noise floor, keep the shutter and aperture the same, or keep the ISO the same if you like to study the noise floor. It sometimes takes me days to think about something or more reading before I am ready to create a new illustration or do my own tests. For example, isolating something like A/D converters helps to see why it cannot be compared on different cameras.

For example, how will one compare the Quantum Efficiency of two cameras? Quantum efficiency is the ability of the sensor to convert photons to electrons. As you have seen from this article, very little ambient light reaches the image sensor at ISO6400 with a starting ISO amplification of ISO200. This should be a great place to start when comparing the QE of 2 cameras. Keep in mind that the different tests I discuss are only ideas. Never allow others to intimidate you, and never STOP THINKING...


Olympus E-P7 with 14-42mm Kit lens - One of the best TOP image quality cameras to always keep with you...


2. Some basics to define your needs and select the right camera

The first step is honesty with yourself. Start with a list of what you like to photograph and what skills you need with a new camera. Looking at my own situation, I like my Olympus Pen-F. That said, we recently added a little Shih Tzu dog to the family, and he started a whole new experience for us. Not only do we enjoy our little dog, we like to have more pictures of him. The challenge is the little dog is just too quick for us. That means I need a camera that could help me...

He is so quick that we do not get the right moment for sharp "action" shots. We don't need a new Sony because there are great examples of people doing action photos with the EM1 MKI. It seems more like a case of practice and knowing your camera. Below is one of my first Pro-Capture images. In fact, let Workspace analyze your Pro Capture sequence...

Pro Capture is a computational feature that places a lot of photography in our hands. Does it all happen with the push of a button? We can select the Pro Capture feature, push the shutter, and wait for the results. You could also end up on a forum complaining about the image sharpness of Olympus cameras. Even though features like Pro Capture or Live Composite can be classified as computational, you still need to use the correct parameters and autofocus settings for your EM1 III or the OM-1. In other words, use your camera and practice...


Olympus EM1 III with 12-45mm f4 Lens - ISO500, f4, 1/2500 - Pro Capture Raw file edited in WS and PS (study the dog?)


A good balance between traditional and digital photography skills helps. You can add any computational features you like to use with your camera.

The best way is to start with a list of what you typically photograph and spend time with your loved ones to page through your older images. The one thing I value most is the older images I have in my database from 2001 onwards. For example, I love going back in time and re-editing my raw files...

Let's take a look at what most people photograph:

  • Landscape photography and spending time in nature are high on the list
  • Most love doing casual wildlife photography when they are visiting parks
  • Some love doing product photography projects in the comfort of their homes
  • Many like street photography, city scenes, and people shots when traveling
  • You can call it event photography, but it really is family portraits & events
  • Others like to record concerts or significant events and need a good camera
  • You will be surprised at how many people edit images on mobile phones
  • Many people want to up their editing skills and are OK with learning WS or PS
  • Most prefer the combination of good Image Quality and smaller cameras
  • Many hobby photographers like to try the newest cameras and sell them
  • Some want to add 4x4 off-roading, motorcycle tours, or motorcar racing
  • We recently added a small dog to the family, and we love to photograph it
  • Some enjoy experimenting with their cameras and any unique features
  • Some like to do something new and photograph the birds in their garden
  • People remember the days of making home movies and want to do videos

You could be more specific and mark your must-haves and nice-to-have items.


Yes, it's an older camera but a good camera for stepping back into photography with a smaller budget.


Most people will agree the above list describes their photography or videos, and they don't need the best-performing camera. From the above list, the Olympus EM5 III is a good option for most photographers. Let's make the EM5 III our "reference" camera and build a solution for the above needs. The next step is to make an application list and then find the right lenses.

Let's list typical applications:-

  • Landscape Photography
  • Portrait, family, events
  • Anything linked to motor vehicles
  • Parks, hiking, wildlife, and birding
  • Concerts or low-light photography
  • Image editing, social media, print
  • Action photography, dogs, cars, sport
  • Folks like family and travel videos

The table below is a simple method of matching your needs to a specific camera solution. This will help you to select the right camera body, lenses, and options for your camera.

Have a look at the examples that might need computational functions. Those are the ones you need to spend more time with. Study the details because that would influence you to take an EM1 III or the OM-1. Always consider the lesser camera body and master it...

It's good to understand the image quality differences between cameras like the EM1 MKII, the MKIII, and the OM-1 are specific. The more time you spend defining your needs, the better you will be able to match your needs to something like an OM-1, EM1X, E-P7, or EM1 III.


Those marketers and promoters who mess with photographers have become so bad that I do not trust a word I see on large photography sites. For instance, the Olympus 12-200mm zoom lens is not a highly regarded lens on social media. I received my secondhand copy this week, and what a pleasant surprise. I need to learn much about this lens and plan to write an article about it.

Some will have a different opinion than me, but my advice is to ignore those who say this lens or that camera is not good enough. I mainly buy secondhand and tried most Olympus lenses. I never came across a lens with serious image quality issues. Some like the older 17mm f2.8 with its AF noise and 3D image effects, while others prefer the 17mm f1.8 for video recording. 

Those who generalize and say this one is soft or that one has "sudden" manufacturing issues are just not honest. If you like to know more, ask for more detailed or real-life examples and images from a particular lens. Walk away from those dropping fact statements or one-liners...


Fuji X-T4 with XF16mm f2.8WR Lens - ISO160, f8.0, 1/40Seconds - Edited with PhotoLab 5 and PS.


What is the difference between the M43 Zuiko lenses and the Pro Series? Both are excellent. The main differences are weather sealing, autofocus performance, size, weight, speed, and the final 1-2% image quality, contrast, sharpness, and color. That said, my personal go-to lenses are the f1.8 Zuiko primes. They are small, lightweight, and deliver excellent image quality.

As you know, my 17mm f1.2 was part of an EM1 III special offer. I tried the 17mm f1.2, and it's good, but interestingly I continued to use my 17mm f1.8 because it's so small and comfortable. I have the 12-45mm f4 Pro, and it's quickly becoming one of my all-time favorite M43 lenses. Something I noticed with Olympus Pro lenses is the ability of these lenses to pass on more detailed data to the sensor. Pro lenses can record more shadow details than premium lenses.

Many photographers are going away from the so-called perfect lenses. Another trend is having a lens with "attitude," especially when doing video work...


May 4, 2022

How much light is reaching the sensor at ISO6400?

Last update:- 29th April 2023

Did you know your ISO does not add more light (image data) to the sensor?

I was listening to an astrophotographer talking about his camera settings. Most astrophotographers are comfortable with the technical aspects of digital cameras. He demonstrated how he shifts the histogram to the right (ETTR) to improve his image quality and record more tonal data.

Many photographers use the ISO and Exposure Comp to apply ETTR. Those who follow this blog know the ISO amplifies the image signal from the sensor. If you like to control the light reaching the sensor, fix the ISO and use the aperture and/or shutter speed. Increasing the reflected light on the sensor means a higher SNR and a more Saturated sensor. The histogram shows the reflected light on the sensor with a fixed ISO. Consider this as "managing" the sensor's ISO to SNR ratio.

Study the illustration below and visualize the reflected light on the sensor at the different ISOs. What do we learn from this illustration? Experienced M43 photographers think of reflected light (luminance) on the sensor. The sensor might receive no reflected light at ISO12800. We always need a light source to illuminate the subject and reflected light to expose the sensor. No reflected light means no recordable image information. The next time photographers quote ISO12800 or ISO20000, ask how much luminance (reflected light) was available at the image sensor?


This illustration shows what the actual scene looks like at each ISO amplification.

The key is to study the technical basics of image sensors. For example, all image sensors have a noise floor, and we control the final visibility of this noise floor. It helps to know the different types of image sensors and the importance of pixel area. Pixels capture Photons and NOT the size of the backplate housing them. The size of the sensor only determines the Lens Image Circle that drives the OPTICAL differences between digital cameras. It's important to know that Pixel Area is one of many Quantum Efficiency variables that determine Sensor Sensitivity.

Saturating the sensor with light means a higher SNR and less image noise. A higher SNR also means we record more tonal data. Digital photographers should know these basics and how to manage them with digital cameras. For example, the technical design aspects of the image sensor are always the same. What are the main Optical and Technical differences between image sensors?

Why does the ISO shift the histogram? Because it's a variable in the exposure equation.


It should be clear why we risk having noise at ISO6400. The above "Photons to Electrons" graph shows what happens with less light on the sensor. Too little reflected light means the sensor's SNR is lower. How do we manage noise at higher ISOs? We typically increase the ISO when we need higher shutter speeds. The key is light. It's safe to use higher ISOs with enough available light. Photographing a Formula One event in daylight is a good example. It's safe to change the ISO and shutter speed with enough light. Also, keep the sun behind you and always have a flash in your camera bag.

What happens at higher ISOs and shutter speeds? We reduce the light on the sensor and increase the image signal amplification (ISO) to maintain the camera's exposure level. 

TIP:- The histogram follows the light on the sensor at a fixed ISO. It's incorrect to say the histogram shows jpeg data in Live View. Consider this typical fact statement from undisclosed promoters. When do we have a jpeg file? There's no jpeg file in Live View before you record the image...

Study this basic example of how to apply this knowledge:-

Consider Bird in Flight (BIF) photography. We can safely increase our exposure with 2 stops (ETTR) when photographing birds against a blue sky. If your final adjustment is between ISO800 and ISO1250, which will you take? ISO800 is the better option because it allows more light on the sensor. More light increases the SNR and sensor SaturationThe info in this article enables photographers. Compare that to those advising M43 photographers to "never go above ISO800"...

For more information on ISO and exposure, see this article - link.

See the 7 Points each photographer should know about digital cameras - link.


Have you asked why forum promoters use Photons to Photos graphs when they roam photography forums? Why do they never talk about the basics in this article? Pointless presentations based on calculations do NOT improve image quality. Always ask this simple question. Does the presented information enable photographers or only those manufacturers selling full-frame cameras?

For example, technical aspects like Sensor Type and Effective Pixel Area could be important when selecting the right camera for low-light conditions. Micro Four Thirds cameras use Live MOS sensors, and most APC cameras use Standard CMOS sensors. The Live MOS sensor has up to 75% less control wiring at each pixel. This means M43 cameras typically have a smaller noise floor. Live MOS sensors also have a larger Effective Pixel Area. This explains the Live MOS sensor's relatively good noise and low-light capabilities. Another interesting technical variable is Sensor Readout Speed.

The size of the sensor drives the optical differences between cameras. The technical aspects of the camera are the same for ALL sensor sizes. Why would some say, "Ignore the technical aspects discussed in this article?" Are they simply dumbed-down fanboys or undisclosed promoters?

Best and God's Bless

Siegfried

Mar 13, 2022

Image Editing with Workspace

Last Update:- 30th May 2023

1. Introduction


Does your photography session end at the PC Workstation or Photo Shoot? This article discusses the PC Workstation option and the practical aspects of having the Enhanced Raw Format and Workspace. For example, most M43 photographers don't see any difference between Workspace and other commercially available Raw Editors (Converters) like Lightroom or PhotoLab.

I also discussed the Enhanced Raw Format in a previous article.


For example, Olympus and OMDS use the same "Advanced Raw Processing" terminology in their press releases. For more info about these Workspace descriptions, see the page here. I also keep a basic timeline of all the Workspace updates and my comments in this link.

The best way to benefit from Workspace is to include it in your photography workflow. You will discover it's not just another raw converter the more you work with Workspace. Workspace becomes an extension of your photography experience with Olympus cameras when you convert your Enhanced Raw Files in Workspace and edit the 16-bit Tiff files in Photoshop.

Why 16-bit Tiff files? See the 1st chapter discussing Dynamic Range in this e-Book.

We will discuss the following:-

  1. Introduction
  2. Why are Workspace and the Enhance Raw Format different?
  3. Who benefits most from using the Enhanced Raw Format?
  4. My preferred Olympus camera settings for Workspace
  5. How does one edit Enhanced Raw Files with Workspace?
  6. Finally, I added a short video at the end of this article
  7. Conclusion


Olympus EM10 II with 12-50mm EZ Lens - Enhanced Raw File converted in Workspace and edited with Photoshop.


2. Why are Workspace and the Enhanced Raw Format different?


Workspace and the Enhanced Raw Format are unique because they use the same Image Processing as the camera. This is why it's possible to end your photography sessions in Workspace. We can review camera settings like sharpness, contrast, or saturation with WS. It is also interesting to simulate the camera Live View display via WS and the Enhanced Raw Format on a PC display. 

What is a typical workflow for Workspace? There is no difference between finalizing your image in the Olympus camera or Workspace. We would typically open an Enhanced Raw File, activate the camera settings, and adjust the camera settings in Workspace. 

The most exciting part is the ability to review our camera settings in Workspace. Another exciting aspect is PC RAW mode. It connects the camera Image Processor to Workspace. In fact, Workspace V2 offers an added benefit because it enables the OM-1 photographer to use the standard Workspace Editing panel in PC RAW mode. This is, unfortunately, only applicable to the OM-1.


The Enhanced Raw Format is the main difference between Workspace and commercially available Raw editors like Lightroom and PhotoLab. The same editing panel is used on raw and jpeg files in WS. The only change is the differences between Enhanced Raw and Jpeg files. Olympus photographers benefit most from using both the raw + jpeg options. (see my video further down)

Like anything else, Workspace improves over time and experience. I reached the point of consistently getting better results with my Enhanced Raw Files and Workspace. This also applies to the 16-bit Tiff files I use in Photoshop. Workspace is much better at converting Olympus raw files, and Photoshop is excellent with the converted 16-bit Tiff files...


Below is an example of the differences between raw and jpeg files. The Enhanced Raw Format has more editing options, and it's possible to simulate Live View in Workspace. This ability to have the equivalent of a Live View display with Workspace does not apply to jpeg files. 

The same Workspace Editing Panel is used on jpegs and raw files, but the unique link between the Enhanced Raw Format and the Olympus Image Processor does NOT apply to jpegs. This is why it is possible to use Workspace ART filters and Color Profiles on the jpegs from another brand. In other words, Workspace is just another image editor for jpegs.


3. Who benefits most from using the Enhanced Raw Format?

Reflected light and the ability to work with light are basic skills all photographers should have. Light or illumination is the key to managing your exposure and image sensor performance. Light is crucial for award-winning pictures and determines if the image is flat or multi-dimensional. 

Anyone who says we don't need a tripod or flash should return to basics. Even if we don't need the best image quality, light is the one thing that makes a difference. The basics of mastering Light, Workspace, and the Camera are reasons photographers are better today...


E-P7 with 25mm f1.8 lens - The 2 Enhanced Raw Files were edited in WS - The difference is Auto Graduation.

Thorsten von Overgaard is an exciting example of an inspiring photographer. Even though I do not own a Leica, my Pen F makes me think... I appreciate the creative freedom with my Pen F, the Enhanced Raw Format, Workspace, and Light when editing 16-Bit Tiff files in Photoshop.


4. My preferred camera settings for Workspace

Some photographers adjust the saturation, sharpness, and contrast with the camera to correct the camera's "color science." It reminds me of Sony's A7 cameras. Olympus cameras have more advanced color functions, and most of these camera settings are available in Workspace. It's now possible to tweak your camera settings in the comfort of your home with a large PC screen and Workspace.

Years back, when I started editing, we learned that adjusting sharpness, contrast, and saturation is not the best way of editing images. A better way of editing is to use a histogram (Curves). I accepted that and focussed on Curves with Photoshop. Olympus has two plus a "half" curve equivalent in the camera and Workspace, the "highlights/shadows" sliders, Graduation, and Tone Curves.


Olympus EM10 III with 14-42mm kit lens - Enhanced Raw File converted in WS and edited in PS.

A better way of sharpening images is the Unsharp Mask function. You can safely start with an Amount of 44 and a Radius of 1.3 while developing your sharpening skills. Image sharpening is a simple process of adding contrast to the contrast areas in the image. You could also use a basic S-Curve in Tone Curves or the highlight and shadow sliders in your camera or Workspace...

One of the most critical decisions is having the same color space for the camera and Workspace. I simply use Adobe RGB for all my software and devices. That means the camera Live View display is the same as my Workspace Live View Display. I only convert my images during my final adjustments to SRGB for posting them on the web or CYM for printing.  


Olympus EM5 with 12-50mm, ISO800, f4.0, 1/6Sec (Handheld) - fully edited in Workspace.


Why do I focus on photography and not my camera settings? The reason is simple, you need to know what is possible in Workspace and what is possible when photographing. For example, you cannot re-adjust your exposure settings (aperture and shutter speed) in Workspace, but you can select a different Picture Mode in Workspace. This knowledge helps us to plan our critical camera settings while photographing versus what we can tweak with Workspace.

For example, while out photographing, focus on your exposure settings. You can always do any final exposure compensation settings in WS. Focus on your inspiration, exposure strategy, direction and quality of light, and having the best viewing or picture angle when you photograph.

It's good to keep a grey card or Spider Cube with you. Place them in the scene and do a few test shots with different angles. Manual Exposure Mode is the best way to master your exposure settings. For example, work with the direction of light and various light sources. The challenge with Manual Exposure Mode is the Exif data does not show any "exposure compensation" settings. If this is a problem, use Aperture Priority with exposure compensation.


Olympus EM1 III with 12-200mm Lens - The Enhanced Raw File was converted with WS.


Why is it important to know if you used exposure compensation? One would correct the exposure compensation settings in Workspace to ensure the correct 18% gray or color values.

Here are my recommended camera settings for Aperture or Shutter Priority Modes:-

  • Always apply the ISO manually (Manual or Aperture or Shutter priority)
  • Do not adjust the sharpness, contrast, or saturation sliders in the camera
  • Always use the jpeg + raw option in your camera (Enhanced Raw files)
  • Use Exposure Compensation to manage the exposure mix of the camera
  • Always use a fixed ISO when your goal is a fully saturated image sensor
  • The focus of using these settings is maximum tonal/image data, not creativity
  • If your focus is a final in-camera jpeg, then these suggestions will change
  • If your goal is a final image in Workspace, then use the Enhance Raw Format
  • We can "simulate" the jpeg in WS and select our best camera settings in WS


Olympus EM5 with 12-50mm lens - ISO800, f4.0, 1/3 sec (handheld on a rail) - Raw File edited in Workspace


A welcome aspect of Workspace and the Enhanced Raw format is how we determine the best camera settings for our unique photography styles. This is especially applicable to jpegs. Workspace offers the best environment with large PC screens to help us fine-tune our camera settings.

5. How to edit your images in Workspace

We are not discussing Workspace features like hotkeys, button functions, or how to re-arrange the editing windows. It's good to take a few minutes and familiarize yourself with WS. You will find the User Manual in the Help Menu. We will focus on standard and enhanced editing functions.


EM10 III with 12-45mm f4 Pro lens - A good camera for Workspace (Color Creator) and Photoshop.

Workspace V2 is slower on my older Macs. I saw this on my older MacBook Pro and iMac from 2014/15. My Macbook is the basic version, and my iMac is well-specified for 2014. The iMac performs well but is slower with V2. Go to my WS tips page for more... 

See the diagram below. It summarises what we discussed in this article. Any computational or AI functions should be part of a separate discussion. The same applies to downloading or importing images to WS or managing and rating your image collection.


Figure 1


The best decision you can make is to study Olympus Software Applications like Workspace and OI. Share. Trust the Olympus Developing and Engineering Teams and the fact that they compete with the best in the industry. Ignore forums, camera reviews, and YouTube with all the undisclosed promotions on these platforms. Trust your own talent and experience with Olympus. For example, photography forums will never admit that the 14-42mm kit lens is an above-average performer. The same is true for the 9-18mm, the 14-150mm, the 12-200mm, and ALL the f1.8 compact lenses.


Olympus 14-42mm f3.5 - 5.6 R II Kit Lens

Workspace is a fully-featured image editor with all the advanced features of Olympus cameras. While not as powerful as Photoshop, the editing features of Workspace are the same as the camera and a good editing solution for Olympus photographers. Workspace is one of the best image editors for those new to editing. The main reason is the similarities between Workspace and the camera.

It's good to start editing with Workspace because it offers similar editing features as the more advanced editors like Photoshop. It's possible to export your Workspace images to Photoshop for more advanced image editing. This makes any editing transition simpler from Workspace to Photoshop.


Figure 2


How to activate Live View in Workspace? None of the camera settings are "live" when you open your Enhanced Raw File in Workspace. All the camera settings are available but have to be activated. Live View is only active when all the camera settings are selected in Workspace. The above illustration shows the process of selecting and activating your camera settings. The camera jpeg or Live View image is displayed when all the camera settings are active.


Olympus E-P7 with 9-18mm f4 lens - Great lens for creative effects - Edited with WS and PS.

Any editing steps discussed in this article reflect my own editing style. I have been using WS from the first day it was launched, and I like to start by activating my raw file or camera settings. See the above graphic. This allows me to sit back and inspect the image in Live View mode. It is good to take a few minutes and study the image before making any adjustments.

These are the steps I follow when I am editing an Enhanced RAW File:-

  • I first activate (select) all my camera settings in Workspace
  • I use a +2/6EV exposure shift with all my Olympus cameras
  • Correct the exposure shift with a -1/3EV exposure compensation
  • This will reset the image colors or neutral grey values to 18%
  • I mostly use the "Low" option for the iEnhance Picture Mode
  • The Highlight/Shadow sliders open shadows and pull back highlights
  • Use the mid-tones slider to adjust the brightness of the image
  • Use the Tone Curve slider for older cameras with no mid-tone slider
  • You could use an S-Curve in the Tone Curve section to add contrast
  • Use the Dehaze and Clarity slider to better define the sky or clouds
  • I do not sharpen my images in Workspace - I prefer Photoshop...
  • I use the RGB color space, and it's critical to activate it in WS
  • I prefer the "Low" option for the Noise Filter in the camera or WS
  • I never use the False Color Suppression in the WS Noise Filter
  • I very seldom use any of the other noise filters in my camera or WS
  • When I am done, I transfer the 16-bit Tiff file to Photoshop...


Olympus E-P7 with 9-18mm f4 lens - The Enhanced Raw File was converted with Workspace.


I typically use a mix of highlights & shadows settings or gradation to determine the final brightness of my images in Workspace. The next step is white balance. There are more ways of selecting your White Balance. One is to leave the WB in Auto or to use the daylight, clouds, or other WB presents. Another option is to select a reference point in the image with the custom WB or Grey Pointer. It can be a gray card in the image or any white surface. 

Don't confuse yourself with image brightness and the correct neutral (18%) grey value. Follow the steps below to optimize your image quality and color:-

  1. Determine your neutral grey exposure settings with the camera exposure meter.
  2. The final exposure settings will include ETTR, WB, and exposure-compensation
  3. The 1st WS step is to set back the exposure compensation for the correct exposure.
  4. The next step is to select the appropriate White Balance for the image and WS.
  5. The final image (exposure) is now ready for the raw conversion steps in WS
  6. For example, any creative brightness tweaks happen from this point onward

It's OK to have a personal style when selecting the white balance for the image. I prefer white areas in shadow areas or the cement between bricks. Your WB point choice represents your preferred image style and look. There are no rules for setting your WB.


Figure 3.


How should I edit my images in Workspace? Image editing is a series of minor adjustments until the image mirrors the photographer's impression of the original scene. There are no rights or wrongs when editing an image. There are probably 3 types of image editing styles for WS:-

  1. Casual image editing (nothing big and small steps at a time)
  2. Creative image editing (various options like ART filters & PS)
  3. Customer contracts (this requires advanced editing in WS & PS)

This article focuses on casual and creative image editing. See my fully customized editing panel in Figure 2. The different editing panels below are from this customized editing panel. I marked each editing step in the illustration below (figure 4). The opening and exporting of your images happen in A and E. Steps B, C, and D are discussed in more detail in the video below. 


Olympus E-P7 with 9-18mm f4 lens - The Enhanced Raw File was converted with Workspace.


The main editing sequence in Figure 4 consists of a step-by-step editing sequence. Steps B and D are used in casual editing, and B, C, and D for creative editing. None of the camera settings are active when you open the Enhanced Raw File. What's displayed on the PC screen is pure raw data. You first need to activate Live View in Workspace. See Figure 3 for more info. I grouped all the Standard Camera settings in Step B to simplify them.

The same applies to any Creative functions. You will activate your creative settings in Step C to see them in Live View. Workspace shows you which options were used in the camera. The only tricky one is the Color Creator. The Color Creator is the final option in the Picture Mode drop-down menu in Step 3. The best way to check if you used the Color Creator is to study your Jpeg Exif data.


Figure 4.


Image editing starts when you analyze the Live View image in Workspace. You will have a good feel for your final image and what you like to change or update. It's important because it's part of your editing/creative process when preparing your final images. 

I typically prepare notes on what I like to achieve with the Live View image in Workspace. Image editing is a simple step-by-step sequence starting at Step A and finishing with Step E.

Workspace is one of the best image editors for those new to image editing. In fact, Workspace quickly becomes powerful the more you use it. For example, I am talking about taking the time or the fact that image editing is a process. What about those cases where speed is critical? Well, that is also possible in Workspace. You would typically take the time to edit the first image and then copy and paste the settings to the remaining images in the sequence.


6. A short video on Workspace and the Enhanced Raw Format


The above video explains the different sections discussed in this article. I also show a few basic editing steps. It is good to know that image editing in Workspace is as simple as adding an S-Curve, selecting a new picture mode, or changing the Noise Reduction from Standard to Low. Image editing in Workspace does not have to be a big thing.

7. Conclusion

I did something I wouldn't normally do when I updated Workspace to version 2. I typically wait a while to safeguard myself and my PC. My concern is speed. The upgrade to Workspace V2 was obviously done to support the new OM-1 and newer PCs.

The previous version of Workspace (V1.5) is a safe option if you don't use the M1 Macbook, or use the EM1 III, or any other Olympus camera. Its fast and older PCs generally support Workspace V1.5 without any issues.


Olympus EM10 III with 14-42mm kit lens - Enhanced Raw File converted in WS and edited in PS

The cost-effective and tested PC is the entry-level Macbook Pro with the M1 processor (I added the 16GB option to mine). If you need the new sequential shooting group display, focus sorting feature, or the AI noise reduction feature of V2, then you need something like the new M1 CPU.

Long-term Olympus users are familiar with Olympus Viewer 3. Workspace is the improved version of Viewer 3. It offers a better interface for the Enhanced Raw format. I kept a copy of Viewer 3 on my iMac and continue to use it. For example, it's a pity that Olympus removed the Gamma function from Workspace. A nice benefit of Viewer 3 is how it displays the camera settings (Enhanced Raw data) in the editing panel.


See the camera settings in the Enhanced Raw File.


What is the Gamma function? Image sensors are linear recording devices. Editing software like Workspace or Photoshop overlays a standard display profile to the raw data. The Gamma slider allows us to adapt or fine-tune this display profile.


Pen F + 60mm Marco - High Resolution 80MP (10368x7776) - Edited in OV3 /Changed the Gamma profile)


Have fun editing your images...

Siegfried

VideoPic Blog Comments

Please add any comments to this article here.

Most read Articles